Uploading assets
Uploading adds files from your computer to the asset library of a space, where each file becomes an asset. You upload when you have new creative to share with your team: a round of edits, a photo shoot, a folder of campaign exports. You can pick files, pick a whole folder, or drag files from your desktop onto the library.
Each upload lands in the folder you have open, or at the top of the library when no folder is open. Focal tracks the progress of every file in the Uploads & Downloads panel, reads each file’s dimensions and duration, and builds a preview for the formats it supports. When the folder has a naming convention, Focal renames the new assets to match it.
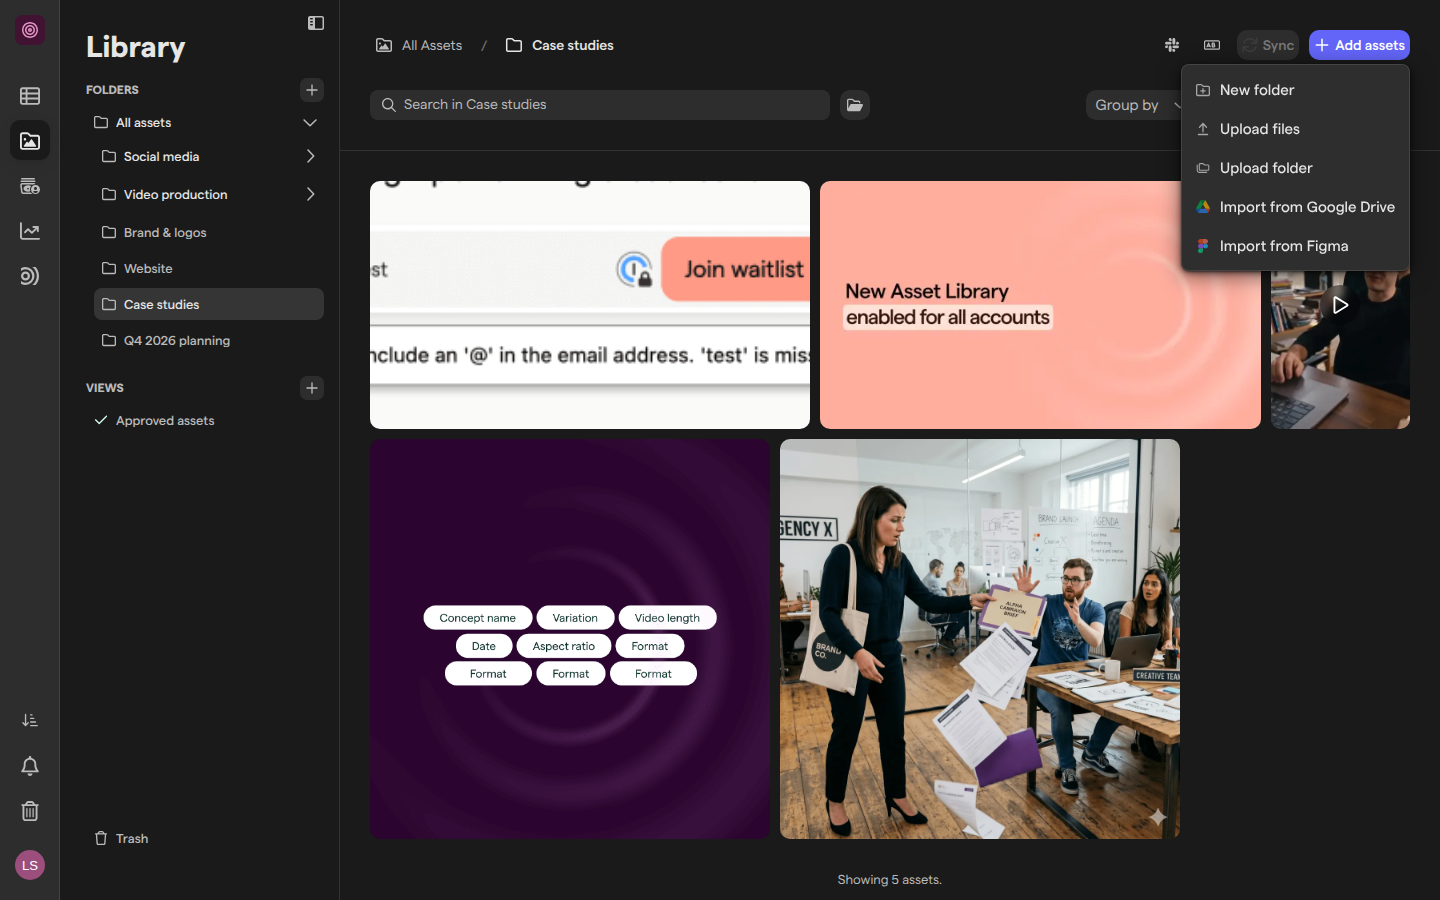
Upload files
Uploading files adds one or more files from your computer to the library, all at once. Pick the folder first: the new assets go into whichever folder is open when you start.
- Open Assets in the sidebar.
- Open the folder the assets belong in, or stay in All Assets to upload to the top of the library.
- Click Add assets in the top right corner.
- Choose Upload files.
- Select the files in your computer’s file picker and confirm.
The Uploads & Downloads panel opens and shows each file’s progress. The new assets appear in the folder while they upload, and fill in once each file is finished.
To add a new version of an asset you already have, instead of a separate asset, see Versions.
Upload a folder
Uploading a folder copies a folder from your computer into the library, including every subfolder in it. Use it to bring in a whole shoot or campaign in one go and keep the structure you already have.
- Open Assets and go to the folder you want the new folder to sit in.
- Click Add assets.
- Choose Upload folder.
- Select the folder in your computer’s folder picker and confirm.
Focal creates the folder, and each subfolder inside it, in the library, then uploads every file into its matching folder. Hidden files, whose names start with a dot, are skipped.
Note: Uploading a folder never merges it into an existing one. If the library already has a folder with the same name in the same place, Focal creates a second folder with that name next to it.
Drag and drop assets into a folder
Dragging and dropping uploads files or folders straight from your desktop or file manager, without opening the Add assets menu. It works in any folder you can upload to, and in All Assets at the top of the library.
- Open Assets and go to the folder you want to upload to.
- Drag the files or folders from your computer over the library.
- Wait for the
Drop to upload to <folder name>message, then release.
Dropped folders keep their subfolders, the same way Upload folder does.
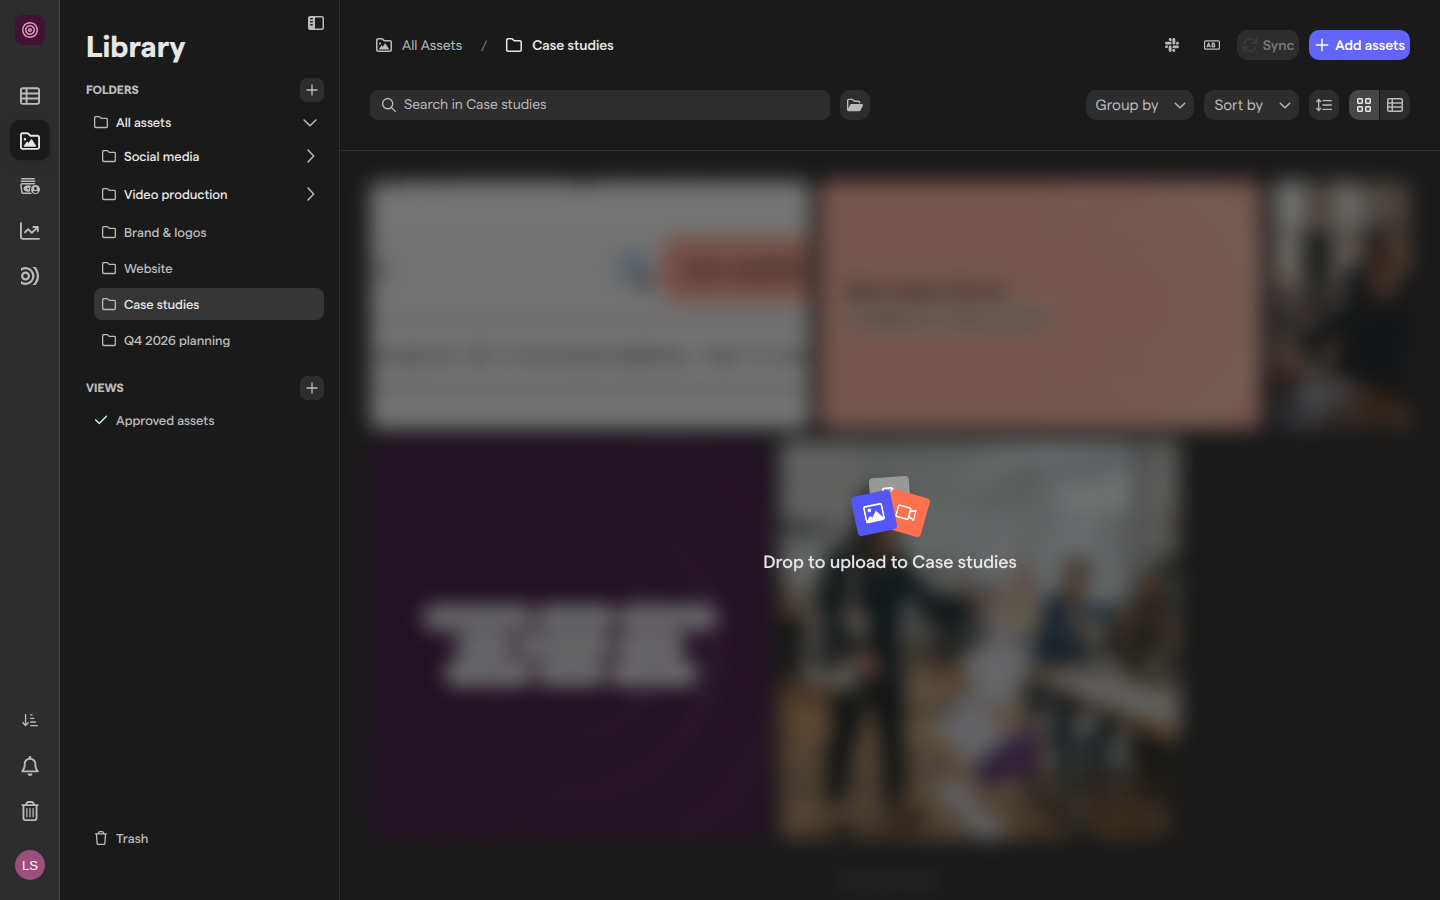
When a folder does not accept uploads, the message reads “Can’t upload here” with the reason under it, such as “Items in this folder are managed by an automation.”, and nothing is uploaded.
Import assets from Google Drive or Figma
The Add assets menu also brings in assets from other tools, into the folder you have open, without downloading them to your computer first.
- Import from Google Drive picks files from your Google Drive. See Google Drive, which also covers keeping a Drive folder in sync with a library folder.
- Import from Figma imports frames from a Figma file. The first time, Focal asks you to connect your account with Sign in with Figma. The Figma connection is described in Space integrations.
Imports from Google Drive show in the Uploads & Downloads panel with a “Google Drive” label next to each file.
Follow uploads in the Uploads & Downloads panel
The Uploads & Downloads panel lists the files you are uploading from the current browser tab, and your recent downloads. It opens on its own when an upload starts. To open it yourself, click Uploads & Downloads in the sidebar, just above Notifications. While files are uploading, the button shows a progress ring and the number of files still in progress.
The panel groups uploads under:
- Uploading
- Waiting
- Failed
- Completed
- Cancelled
Downloads have their own Downloads group, which stays with your account from one session to the next; see Exporting assets. Each uploading file shows its status:
- “Waiting…” and “Uploading…” while the file queues and transfers.
- “Retrying…” when a part of the file failed to send and Focal is trying again on its own.
- “Finalizing…” once the bytes are sent and Focal is creating the asset.
- “Completed”, “Cancelled”, or “Failed” followed by the reason.
The buttons beside each file cancel an upload in progress (Cancel upload), try a failed one again (Retry upload), or remove a finished file from the list (Remove from list). Clear all empties the Failed, Completed or Cancelled group.
Note: Uploads run in your browser. Keep the tab open until every file shows “Completed”; closing or reloading the tab stops the files that have not finished, and removes your uploads from the panel.
What happens to a name on upload
A new asset takes the name of the file you uploaded, unless the folder it lands in has a naming convention. A naming convention is a naming pattern set up in space settings and switched on for a folder; Focal renames every asset added to that folder, and to its subfolders when the convention is applied to them.
To see whether a folder has one, open the folder and hover over the naming convention button to the left of Add assets. The tooltip reads “Naming convention enabled. Click to see details” when one is on, and “Configure naming convention” when there is none. Click the button to see which convention the folder uses.
The asset first appears under the name of the file you uploaded, and is renamed once the upload finishes and Focal has read the file’s details. For example, a folder that uses a convention with the pattern social_<platform>_<type>_<YYYYMMDD> renames an image uploaded on June 29, 2026, with YouTube as its Platform attribute, to social_youtube_image_20260629.
An asset named by a naming convention cannot be renamed by hand. How to set up a convention, and what its counters and fields do, is in Naming conventions.
Supported formats
Focal accepts files of any format. For the image and video formats below, it builds a preview you can view and play in the library; every other file is kept as a downloadable asset without an image or video preview.
| Kind | Formats with a preview | Largest file with a preview |
|---|---|---|
| Image | JPEG, PNG, GIF, WebP, AVIF, HEIF and HEIC, TIFF, BMP, ICO, SVG, PDF, PSD, AI, EPS, InDesign, JPEG 2000, JPEG XR, JPEG XL | 1 GB |
| 3D | GLB, OBJ, PLY, USDZ, 3DS | 1 GB |
| Video | MP4, MOV, WebM, MKV, AVI, OGV, MPEG-2 transport stream (TS, MTS, M2TS) | 4 GB |
These formats upload without a preview: raw camera files (CR2, CR3, ARW) and DNG, DjVu, TGA, MPEG, MXF, FLV, WMV, 3GP and 3G2 video, fonts (TTF, OTF, WOFF, WOFF2, EOT), and HTML files. An image larger than 1 GB or a video larger than 4 GB still uploads, but is stored without a preview.
Upload limits
An upload has three limits, and Focal tells you when you reach one:
- 500 files at a time. Selecting or dropping more shows “Too many files — upload up to 500 at a time.” and nothing is uploaded. Split the upload into smaller batches.
- 200 GB per file. A larger file fails with “File exceeds the maximum size of 200.00 GB” and shows under Failed in the Uploads & Downloads panel.
- Trial allowances. A trial organization can hold a fixed number of assets and a fixed amount of storage. Once either runs out, the files that did not fit fail with “Your trial’s upload limit has been reached.” or “Your trial’s storage limit has been reached.”, and Focal opens Your trial limits with your usage. Get in touch with us to raise the allowance.
Your organization’s usage is on the Usage settings page.
Where you can upload
Uploading is open to space owners and members, and to organization admins in every space. Guests have no access to the asset library, so they cannot upload. The roles are described in Roles and permissions.
Some folders do not accept uploads, whatever your role. In those folders Add assets is greyed out, and hovering over it gives the reason after “Cannot add assets here:”:
- “Items in this folder are managed by an automation.” An automation creates and fills the folder, so new assets arrive through the automation.
- “This folder is connected to Google Drive. Add new items in Google Drive to sync them here.” The folder syncs with a Drive folder, so you add files on the Drive side. The same applies to a folder synced with Dropbox.